
How to caption photos in Lightroom (not Classic)
Lightroom reads captions straight from your files — so caption them on disk, and they appear in the Info panel. Here's the workflow, including the one setting RAW shooters must turn on.

Lightroom handles captions perfectly well — you can type one into the Info panel and it saves it to the photo. What it won’t do is write the caption for you. That’s still a blank field and a blinking cursor, once per photo.
So let something else generate them. Because Lightroom reads captions from the same standard field PhotoCaptioner AI writes to, captions created outside Lightroom just show up inside it.
Here’s the workflow, including the one setting you must get right if you shoot RAW.
Why this works: both apps use the same caption field
PhotoCaptioner AI writes captions into the standard IPTC/XMP caption field — the same field Lightroom’s Info panel reads from and writes to, and the same one Bridge, Photoshop, and photo agencies have used for years.
Neither app owns the caption; the file does. So when both are pointed at the same files on your Mac, a caption written by one is simply there in the other. You can still edit it in Lightroom afterwards like any caption you’d typed yourself.
The important consequence: this only works with photos that live on your Mac, not with photos that exist only in Lightroom’s cloud. That’s why step one is Local mode.
Step 1 — Switch Lightroom to Local
At the top of the Lightroom window you’ll see two modes: Cloud and Local. Click Local, then open the folder holding the photos you want to caption.
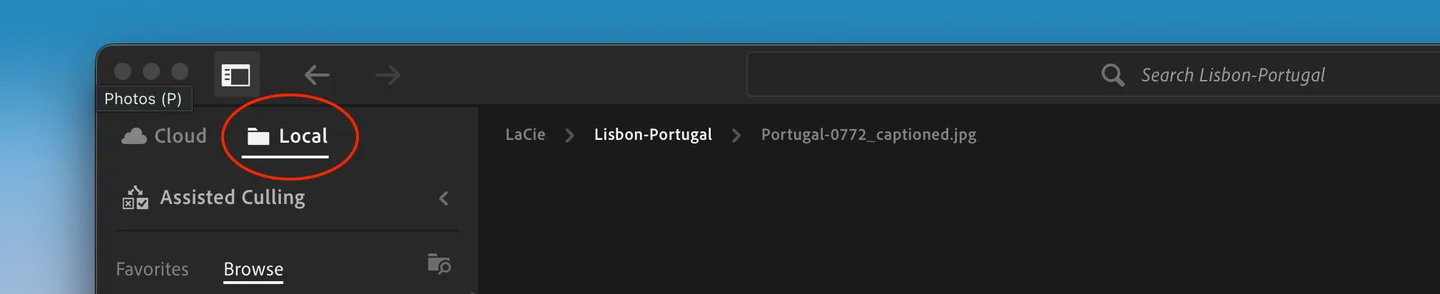
Local mode works with the actual files on your drive — which is exactly what we need, because that’s where the caption is going to be written. Make a note of which folder it is; you’ll point PhotoCaptioner at the same one in a moment.
Step 2 — Turn on XMP in PhotoCaptioner (RAW shooters: don’t skip this)
This is the step people miss, and the reason captions sometimes never appear.
Open PhotoCaptioner AI → Settings (or press ⌘,), go to Processing, and
under RAW Files choose XMP sidecar.
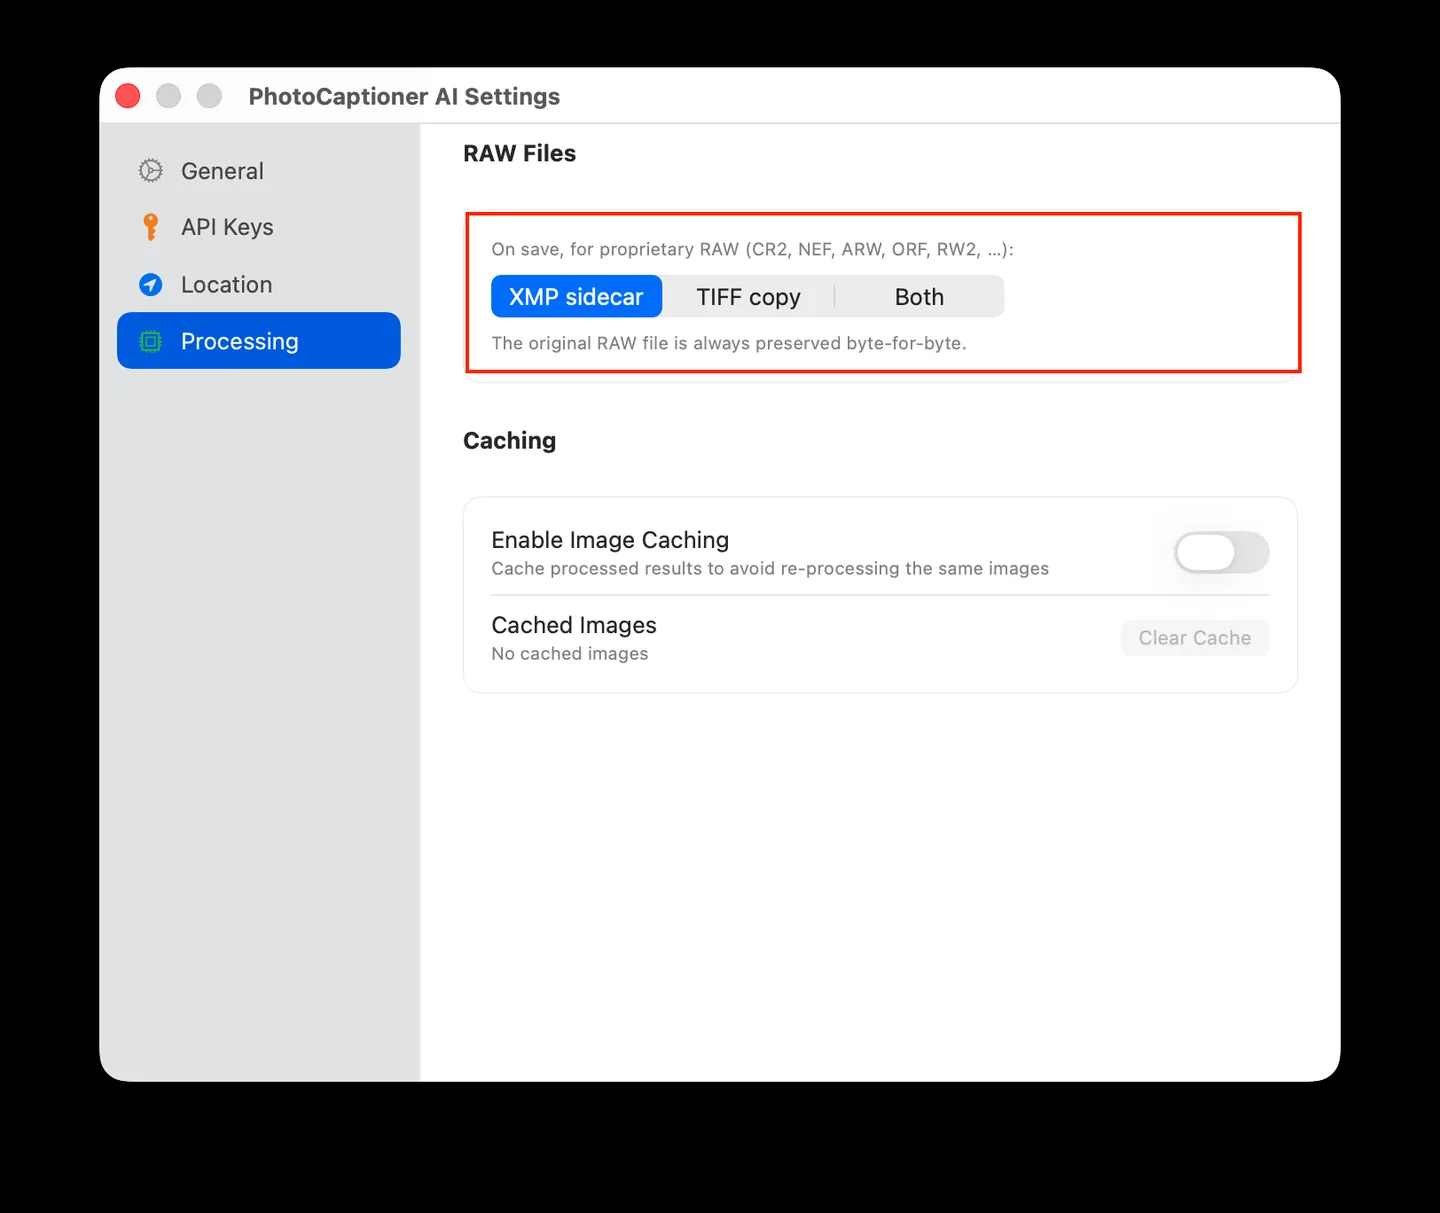
You have three choices there, and they decide what happens when you save a proprietary RAW file:
- XMP sidecar — writes the caption to a small companion file next to the photo. This is the one Lightroom reads.
- TIFF copy — saves a separate TIFF with the caption embedded. Fine as an export, but it doesn’t caption the RAW you’re browsing in Lightroom.
- Both — does the two above.
Pick XMP sidecar (or Both). Your original RAW file is never modified — it’s preserved byte-for-byte either way.
Here’s why the sidecar exists. RAW files — .CR2, .NEF, .ARW, .ORF,
.RW2 and friends — are treated as read-only originals, so metadata isn’t
written back into them. It goes into a companion file with the same name and an
.xmp extension, sitting right next to the photo:
Portugal-0772.CR2     ← your untouched RAW file
Portugal-0772.xmp     ← the caption lives here
Lightroom looks for that sidecar automatically. Without XMP enabled, there’s nothing for it to read, and your RAW files will keep showing an empty Caption field no matter how many times you re-caption them.
Step 3 — Caption the photos in PhotoCaptioner AI
Now point PhotoCaptioner at that same local folder:
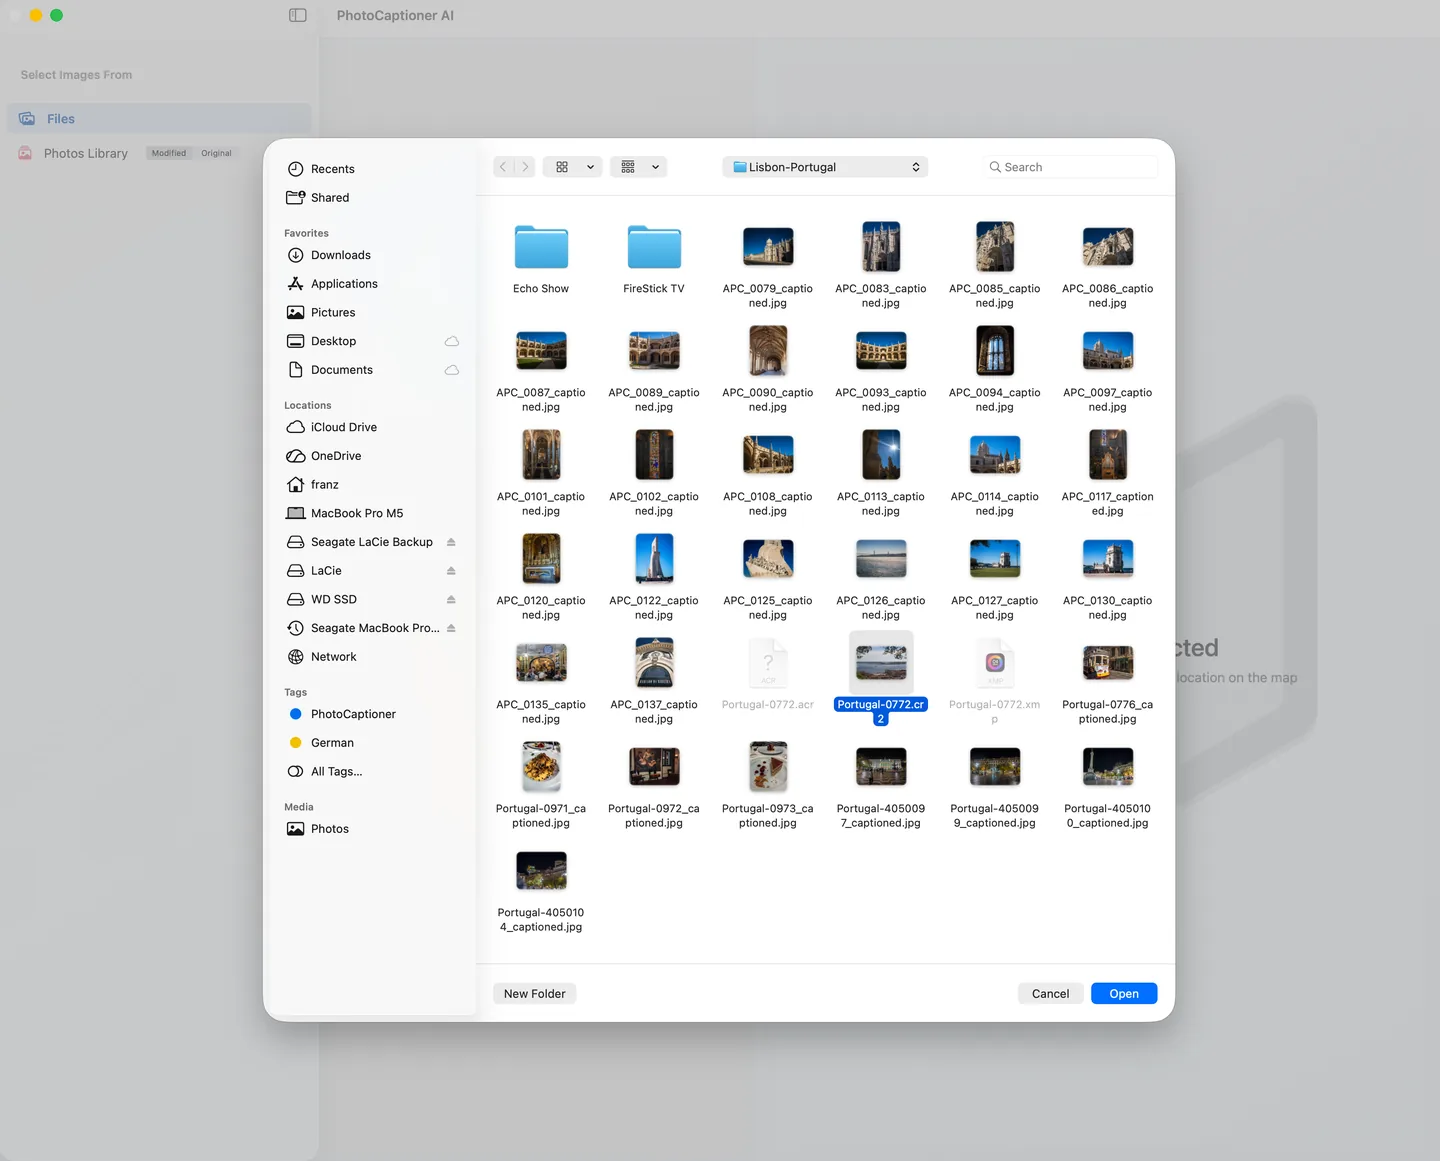
- In PhotoCaptioner AI, choose Files and select the photos from the local folder you opened in Lightroom.
- Let it generate the captions.
- Read through them and edit anything you’d word differently.
- Save. The captions are written to disk — into each JPEG, or into an
.xmpsidecar next to each RAW file.
If you haven’t set up your Gemini key yet, that’s a two-minute job: how to get a free Gemini API key.
Step 4 — See the captions in Lightroom
Back in Lightroom, open one of the photos you just captioned and look at the Info panel. The caption is already there — it appears immediately, with no import, sync, or “read metadata” step to run.
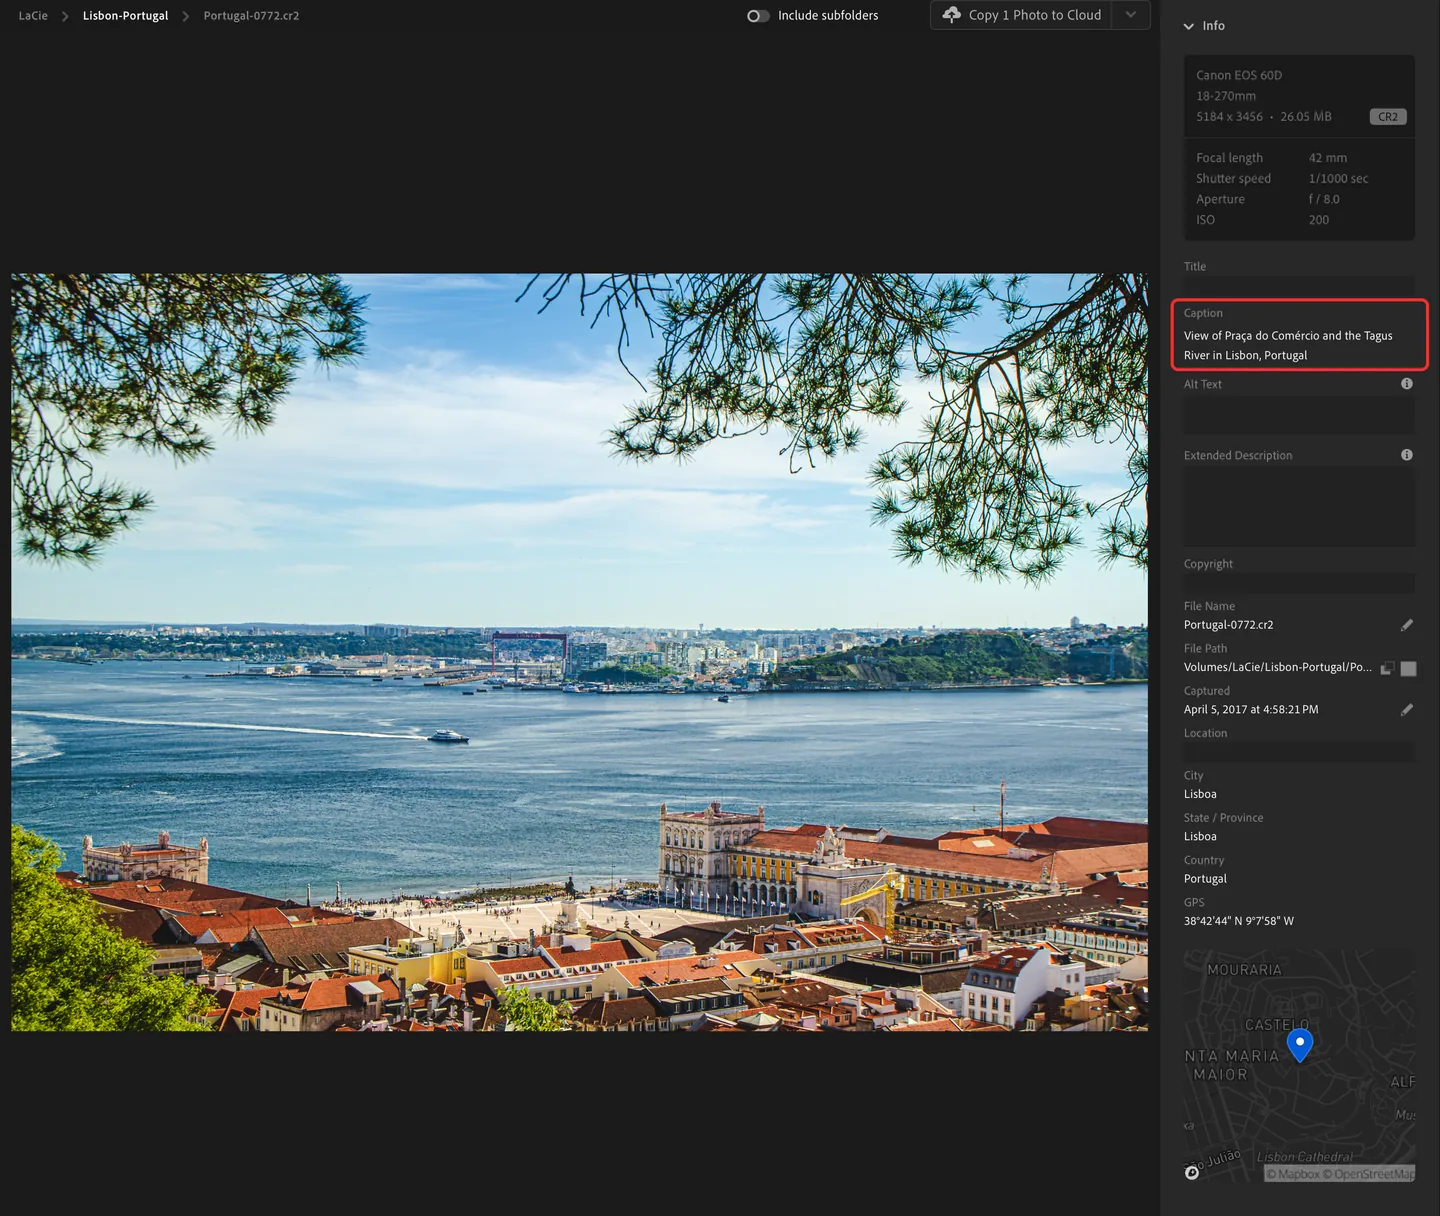
From here the caption behaves like any caption you’d typed yourself — it’s searchable, it exports with the photo, and it follows the file wherever it goes.
If the caption doesn’t show up
Work down this list — it’s almost always the first item:
- RAW Files was set to TIFF copy, not XMP sidecar. Switch it to XMP sidecar in Settings → Processing and caption those RAW files again — the setting only affects saves made after you change it.
- The
.xmpsidecar got separated from the photo. It must sit in the same folder with the same base filename. If you moved or renamed photos afterwards, move or rename the.xmpfile to match. - You’re looking at a cloud copy, not the local file. Check that you’re on the Local tab, in the folder you actually captioned.
Why bother captioning at all
Once the text is in the file, it works everywhere: Lightroom’s search finds it, Spotlight finds it, it exports with the image, and publishers and stock libraries get the description they ask for. And unlike a note in an app, it’s still there in ten years — IPTC is an open standard that outlives whatever software you’re using today.
The part that used to make this impractical was writing a real description for every single frame. That’s the part worth handing off.
PhotoCaptioner AI
Ready to caption your photo collection?
Try your first 25 captions free. Unlock Pro with one purchase—no subscription.